With an average shopping cart abandonment rate of 70.19% in 2024, converting and retaining customers becomes a challenge for most businesses.
The heart of any successful eCommerce store is the platform that it’s built on.
As your business evolves, so might your platform needs, prompting the question of whether your current platform of choice is still the right fit.
Magento and Shopify are two of the biggest players on the digital landscape, but what if you started with one and now want to switch to the other?
In this post, we’ll examine the steps and tips for a seamless Magento to Shopify transition.
What Are The Benefits Of Migrating From Magento to Shopify?
Switching from Magento to a Shopify store has several perks, including:
- Cost-Effective Solution: Shopify comes with lower development costs, support and collaboration requests at no extra cost, server and hosting management features, which means you can allocate those resources for other aspects of your business.
- Better Loading Speed: Shopify takes pride in its server management features, which translates to faster site speed and more reliable performance. As such, it’s more user-friendly and requires minimal technical knowledge to operate. Since websites that take only a second to load convert 2.5x times more visitors than one that takes 5 seconds, this can improve your bounce rate over time.
- Scalability Options: As your business needs grow as does the demand for higher resources and increased traffic, you can use Shopify’s scalability to optimize performance.
- Better Security Features: While you can take measures to limit eStore risks for your Magento platform, Shopify promises strict security protocols and a range of add-ons to ensure hassle-free operation.
While there may not be one clear winner in the Shopify vs Magento showdown, you can analyze your options and determine if they align with your business plan.
What Data Can You Migrate From Magento To Shopify?
Even if you’re already determined to make the switch, it’s important to understand the type of data you’ll have to transfer between platforms:
- Products and Product Categories: All the items listed on your website, including names, pricing, availability, images, meta titles and descriptions.
- Static Page Content: About us or contact pages, blog sections and other CMS pages.
- Customer Information: Names, payment details, billing and shipping address, related discounts and coupons. However, users can’t migrate their passwords, so make sure they know how to use the password reset functionality on your sites.
Additional data options may be available for migration based on the specific tool you use.
You should check your CSV file for missing or duplicate data before importing to Shopify.
How To Migrate From Magento to Shopify
Migrating from Magento 2 to Shopify is a complex process that involves detailed, technical steps to ensure a smooth transition.
Step 1: Preparation And Planning
1. Evaluate Your Current Magento Store
- Identify Data to Migrate: Determine which data types (products, customers, orders, categories, reviews, CMS pages) you want to migrate to your new store.
- Check for Custom Code: Audit customizations, themes and extensions that may require additional effort or different solutions on Shopify. Check if your current Magento website is using customizations or integrations that are essential for your business, such as ERP, CMS or marketing tools that you would also require in your new Shopify store.
2. Back Up Your Data
Use Magento’s built-in backup system (System > Tools > Backups) or manually back up your database and files through your server’s control panel or command line (mysqldump for database backup).
3. Set Up Your Shopify Store
- Sign Up: Create a Shopify account.
- Choose a Theme: Go to Online Store > Themes in your Shopify admin to select and customize a theme. Use Shopify’s Liquid templating language for advanced theme modifications.
4. Identify Key Integrations
Make a list of all extensions and their equivalents in Shopify. For custom integrations, consider using Shopify’s API or apps from the Shopify App Store.
If some of the modules that are used in your Magento site don’t have Shopify equivalents, you can consider the alternatives but discuss it with relevant parties before proceeding.
Step 2: Export Your Data From Magento 2
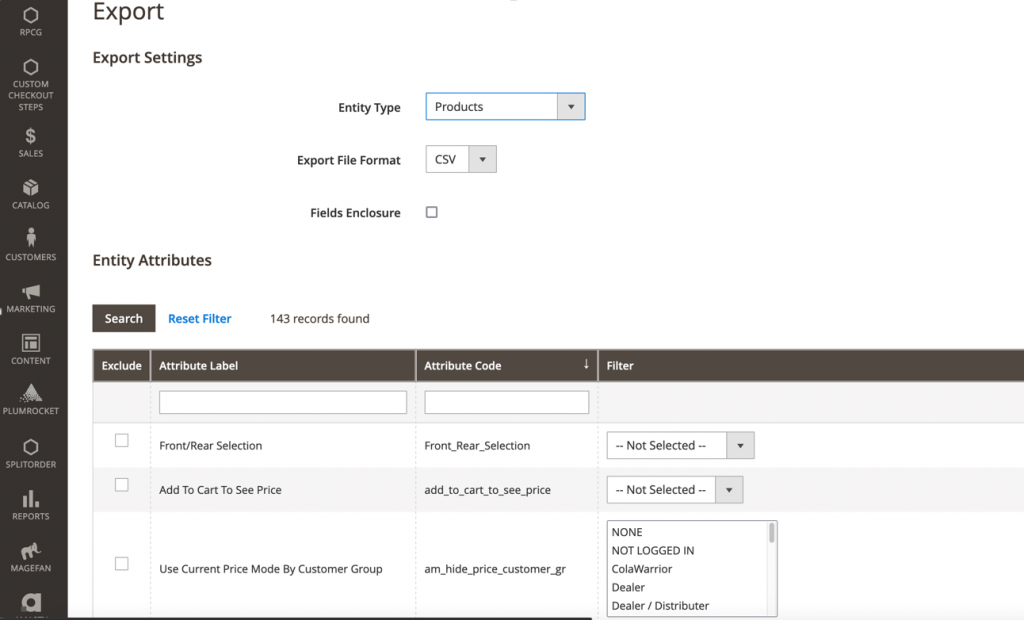
1. Export Products, Customers and Orders
- Go to System > Data Transfer > Export.
- Choose Entity Type (Products, Customers, Orders).
- Select the necessary attributes and click Continue.
2. Export Additional Data
Use Magento’s Data Export Profiles or SQL queries in your database for complex exports. Tools like n98-magerun2 can simplify this process.
If you are good with SQL, you can export these directly from the database with CMS_PAGE and CMS_BLOCK tables.
For attributes, you would need to export EAV_ATTRIBUTE but this is a more complex EAV model and requires some JOIN SQL operations to retrieve all necessary data based on the attribute type.
Step 3: Data Preparation For Manual Import
- Match Shopify CSV Format: Shopify has specific formatting requirements for CSV imports, which include mandatory fields like Handle, Title, Body (HTML), Vendor, Product Type and Tags.
- Adjust Product Data: Check for inconsistencies in SKUs, prices, stock statuses and product descriptions.
- Clean Up CSV Files: Remove unnecessary columns and ensure data consistency using tools like Excel, Google Sheets or CSV editors like CSVed.
- Verify Data Integrity: Use validation tools to check for missing fields or incorrectly formatted data.
Step 4: Import Data To Shopify
1. Use Shopify’s Import Tool
- Products: Go to Shopify Admin > Products > Import. Upload your CSV file and map fields if required. Shopify will display errors for incorrect data formats; adjust the CSV as needed.
- Customers: Navigate to Customers > Import Customers and follow a similar CSV import process.
- Orders: You can’t import orders directly via CSV into Shopify. Use third-party apps like Matrixify (formerly Excelify) or Shopify’s Order Migration App.
2. Use Third-Party Apps (Optional)
- Cart2Cart: Offers a step-by-step guided migration with pre-selected data mapping options for a more automated process.
- LitExtension: Provides one-click migration services and advanced migration options, such as preserving SEO URLs and customer passwords.
Step 5: Set Up Your Store On Shopify
1. Recreate Categories And Collections
- Manual Setup: Go to Products > Collections and create new collections. Use conditions (like tags or product types) to auto-populate collections.
- Bulk Import Scripts: Use Shopify’s Admin API or GraphQL to automate the creation of collections if dealing with a large number of categories.
2. Design And Customize Your Theme
- Edit with Liquid: Customize your theme’s code via Online Store > Themes > Actions > Edit Code. Liquid is Shopify’s templating language used for building custom themes.
- CSS and JavaScript Adjustments: Modify the stylesheets and scripts as needed to match your old Magento design.
3. Set Up Payment and Shipping Options
- Payment Gateways: Configure your payment gateways in Settings > Payments. Shopify supports multiple gateways, including PayPal, Stripe and Shopify Payments.
- Shipping Zones and Rates: Set up shipping in Settings > Shipping and Delivery, adjusting rates based on weight, price or location.
Step 6: Test Your New Shopify Store
- Test key functionalities like product search, filtering, checkout and third-party integrations.
- Place test orders using different payment methods to ensure the checkout process is functioning correctly.
Step 7: Go Live and Monitor
1. Update Your Domain
Point your domain to Shopify by updating DNS settings. Set your Shopify store’s primary domain in Settings > Domains.
2. Monitor Performance
Use Shopify’s built-in analytics, Google Analytics, and third-party tools like Hotjar to monitor traffic, site speed, and user behavior.
10 Tips On Magento To Shopify Migration
Going from one platform to the other doesn’t happen with a quick flip of a switch — it involves preserving your store’s core identity and continuity.
With careful planning and execution, you can make the transition smooth and stress-free.
1. Consider The Timing
Like most online businesses, you likely experience peak seasons or high-traffic periods, such as holidays, special events, or product launches.
It would help if you planned your migration during low-volume periods to minimize disruptions and downtime.
2. Inform Your Customers
Brand transparency is a vital component of your marketing strategy because you establish positive rapport with your clients and connect with them on a human level.
In fact, 80% of consumers feel that the experience a company provides is just as important as the products, or services they offer.

You can boost your integrity and credibility if you’re upfront with users about your intentions.
You could include your reasons for making the switch, how soon you plan on completing the transition and what that entails for users in the future.
3. Create A Full Backup To Prevent Data Loss
Once you’ve evaluated the unique features of your Magento store — including signature functionalities, custom SEO strategies and content structure — you should perform a backup to preserve all your data.
You can do this in the Admin panel on the Magento back-end.
Look for the ‘Backups’ option in the ‘Tools’ section and select the type of data you’d like to transfer.
This step allows you to have a restore point in case there are any hiccups in the migration process.
When exporting from Magento to Shopify in CSV format, use Unicode (UTF-8) encoding to keep symbols and special characters intact.
Always perform incremental backups and ensure both sites are in maintenance mode during the final data sync between the two systems. This prevents customer orders from being lost or out of sync order numbers.
4. Use Data Import Apps To Streamline The Process
While Shopify supports data import through its Admin page, it unfortunately doesn’t support all data types.
Plus, manually copy-pasting large amounts of data is a tedious and time-consuming process, which is a luxury that not many businesses have.
To do a full migration, you’d need third-party apps such as LitExtension, which can migrate from numerous stores, including Magento to Shopify.
Although such apps typically come at a cost — usually based on the volume of products and customers you need to import — they can ease the burden of manual data migration and mapping
Regardless of the app you choose, you should make sure your data is error-free so that your imported files don’t get corrupted in the process.
For images, you must reference them as URLs in the data import. Shopify will automatically download from the URLs and import the images.
In terms of product descriptions, each item can only have 3 options — e.g., color, size, fabric — and a maximum of 100 variants per product, so make sure to optimize these categories.
5. Review Your Imported Files Carefully
Reviewing imported files helps you make note of any discrepancies or missing data before you launch your website.
You can make the necessary adjustments without affecting your live store.
Some of the more common issues include:
- Missing products or customers
- Failed import collections or categories
- Successful imports of unpublished products
- Failed product variants or record tags
6. Set Up Payment Gateways
Since you’ve likely already undergone the Magento payment gateways integration, you understand the fundamental role this technology plays in securing users’ financial information and transmitting it to the transfer-processing end of the transaction.
This encrypted connection moves sensitive information in real-time and provides an intuitive payment experience for consumers.
When comparing different solutions, you should assess potential transaction fees and compatibility with your target market.
Either way, you’ll need to manually set up payment gateways, shipping and cart rules after the migration.
7. Enhance UI With Custom Themes
How well your store’s design and navigation panel reflect your target audience’s values is at the core of this personalized and human-centric experience.
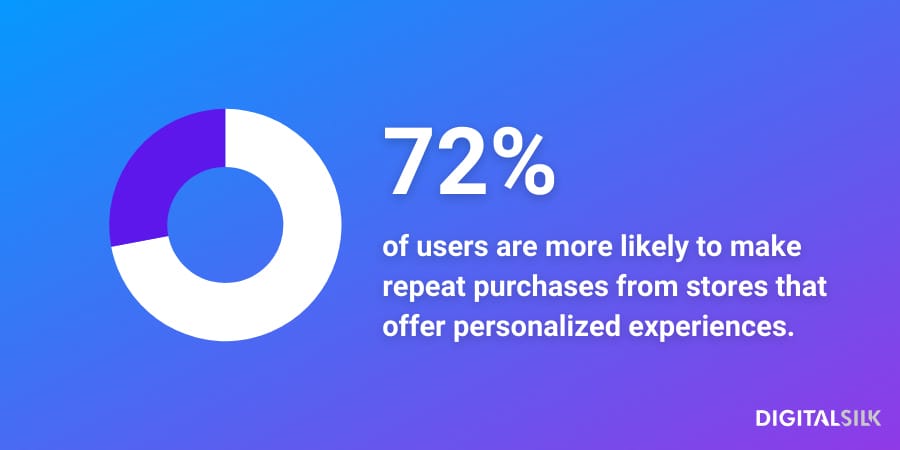
Your products or services exist to solve a real problem consumers have.
When you analyze and understand consumer behavior, you can tailor your store’s ergonomics, UI/UX design, messaging and visuals to connect with your target demographic.
If you play your cards right, you can authentically lead audiences to your products or services and break through the noise in a saturated digital landscape.
With custom themes and templates, you can create a signature identity for your Shopify store and attract and convert new users.
Think about the features and functionalities that are most important to your business. Analyze your specific industry and what your competitors might be doing in terms of the number of categories or advanced search filters.
As many as 60% of users cite usability as the most important design characteristic, so try to create an eStore that’s user-friendly, easy to navigate and uses a signature color palette.
8. Run Tests On A Development Environment
It’s a good idea to run tests on any changes or updates before you push them live.
In most cases, you can process an unlimited number of test orders, create unique product listings and assign custom domains.
Moreover, on the Shopify Advanced plan, you can enable developer previews to get access to all the features, including comprehensive reports on performance, international and cross-border management tools and up-to-date carrier-calculated shipping.
However, you can’t transfer this store to another owner to turn it into a paid plan, so this can only serve for educational and research purposes.
This built-staging section allows you to preview and test store changes without major setbacks.
9. Conduct Post-Migration SEO Audit
It’s common for websites to experience a dip in traffic during migration. But if you act promptly and accordingly, you can reverse some of these effects.
To mitigate loss risks, you should set 301 redirects to ensure your new Shopify store has no broken or missing links.
In this way, users who click on your Magento store address and any other product page will be automatically redirected to your Shopify page.
Use SEMrush or Ahrefs to analyze your store’s SEO performance and make necessary changes to improve its ranking.
Additionally, metadata issues and indexing settings determine how well your site performs on search engines.
Check your current title tags, meta descriptions and headers to ensure they’re optimized for relevant keywords.
You can use site crawler tools like Screaming Frog or Google Search Console to index an existing Magento store. This will help you identify all the URLs that need to be redirected or mapped to the new structure in Shopify.
Once you’ve created the new sitemaps, delete the old ones so that Google doesn’t index inactive pages.
You can create redirect paths mapping for import in Excel based on the old Magento and new Shopify structures.
Once you’ve saved this as a CSV file, you can import it into Shopify to handle redirects.
Plus, Shopify’s interface allows you to manually create redirect rules within its admin panel, so it’s easy to manage basic redirects without needing a CSV import.
10. Optimize For Mobile
In a hyper-connected society where most of us are glued to our phones, it’s impossible not to prioritize mobile optimization.

Focus on creating a user-friendly interface with legible fonts, simple navigation and minimal design elements.
Since users will be viewing your website on a smaller screen, it’s important not to overwhelm them with a cluttered layout.
This can also influence site speed since complex designs might need more time to load.
Important Considerations In The Migration Process
You should have a Magento to Shopify migration checklist to guide you through the migration process and facilitate a smooth transition. Some of the key aspects to consider include:
- Scope of the Migration: Determine which data and features you’ll need the most and consider whether you need any extensions or plug-ins to streamline the process.
- Compatibility Testing: Make sure your current theme, apps or third-party integrations are compatible with Shopify. If not, you may need to opt for alternatives or reach out to developers for assistance.
- Post-Migration Support: Even if the initial process goes smoothly, you should monitor your site and promptly address user issues. This can boost customer satisfaction and prevent potential loss of sales due to technical issues.
- Use Shopify Resources: The platform has built-in features and resources, including themes, plugins and support services to optimize your website functionality.
Streamline Your Magento To Shopify Migration With Digital Silk
At Digital Silk, we understand the delicate nature of Magento to Shopify migration.
Our team of experts is more than just the guiding force behind your store revamp — we’re your strategic partner in growing your brand online.
As an end-to-end web design agency, we deliver a platform-agnostic approach to your eCommerce journey.
Our services include, but aren’t limited to:
- Shopify Development
- Magento Development
- Branding Services
- Web Design and Development
- Digital Marketing
We take ownership of each project and treat it like our own, without making you feel like we’re taking over.
We strive for transparent communication, regular client updates and measurable results.
Contact our team, call us at (800) 206-9413 or fill in the Request a Quote form below to schedule a consultation.
"*" indicates required fields


